 Tweet
Tweet
WANTED: FJ40 window frame and a good hood.
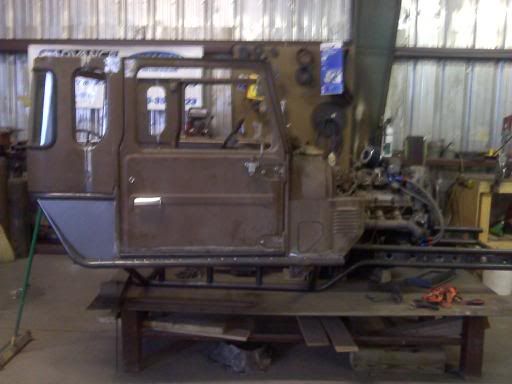
LATEST PIC
LATEST DRAWING

Large pile of 70s Jap rust
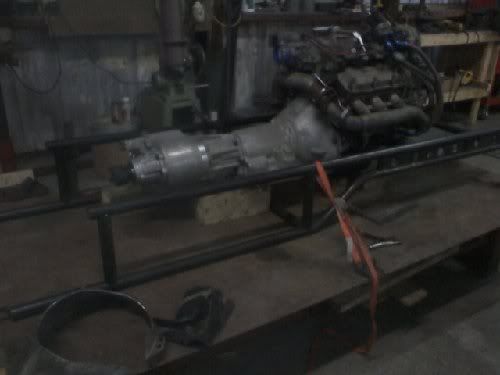
Double frame rail tube chassis
3800 super charged V6
904 trans
5.1 atlas
Raceline wheels
40/17 maxxis trepador tires
60 front w/PSC steering, Dynatrac chromoly shafts and joints, Dynatrac Hubs, Detroits w/5.13
60 rear w/PSC steering, cv shafts and joints, Detroits w/5.13
alu links johnnies on lowers, hiems on uppers
PRP seats
Griffin radiator and coolers
Vintage heat and air
Fiberglass hood, fenders and grill
most of the work is being done by Richard at The http://thehobbieshop.com/
Hard to say what it really is. It not a frame build since everything is tubed. Not really a tube buggy since it has a boxed cab. It will have some exo cage and some not. A real mixed up beast, just like I want it.
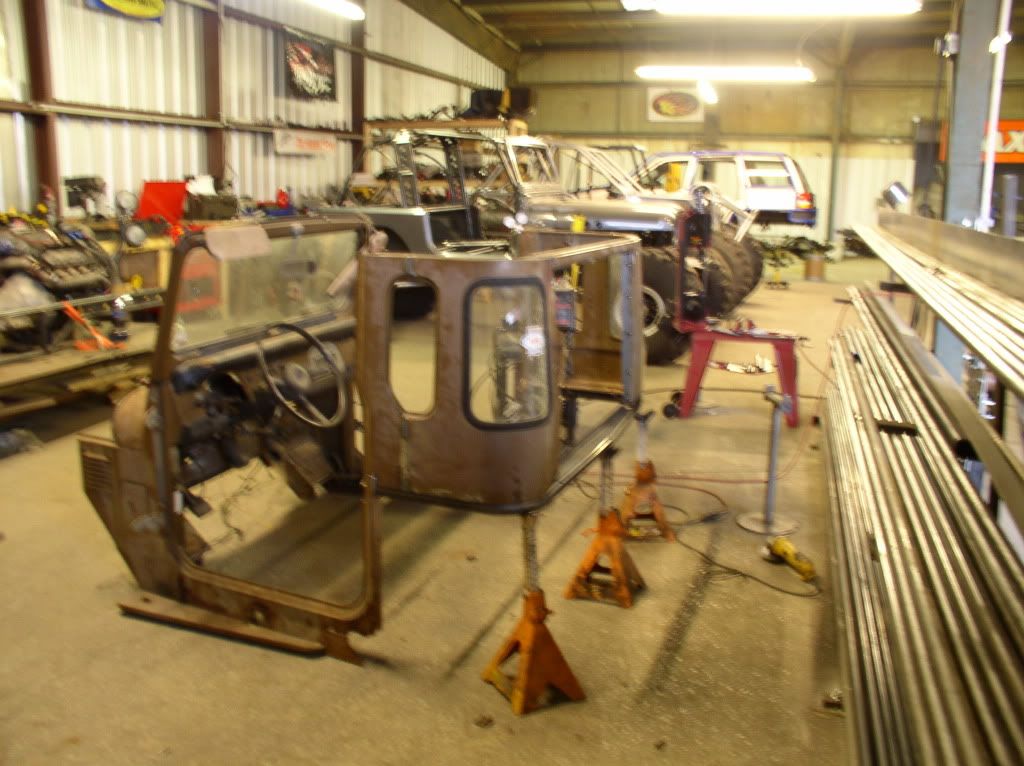
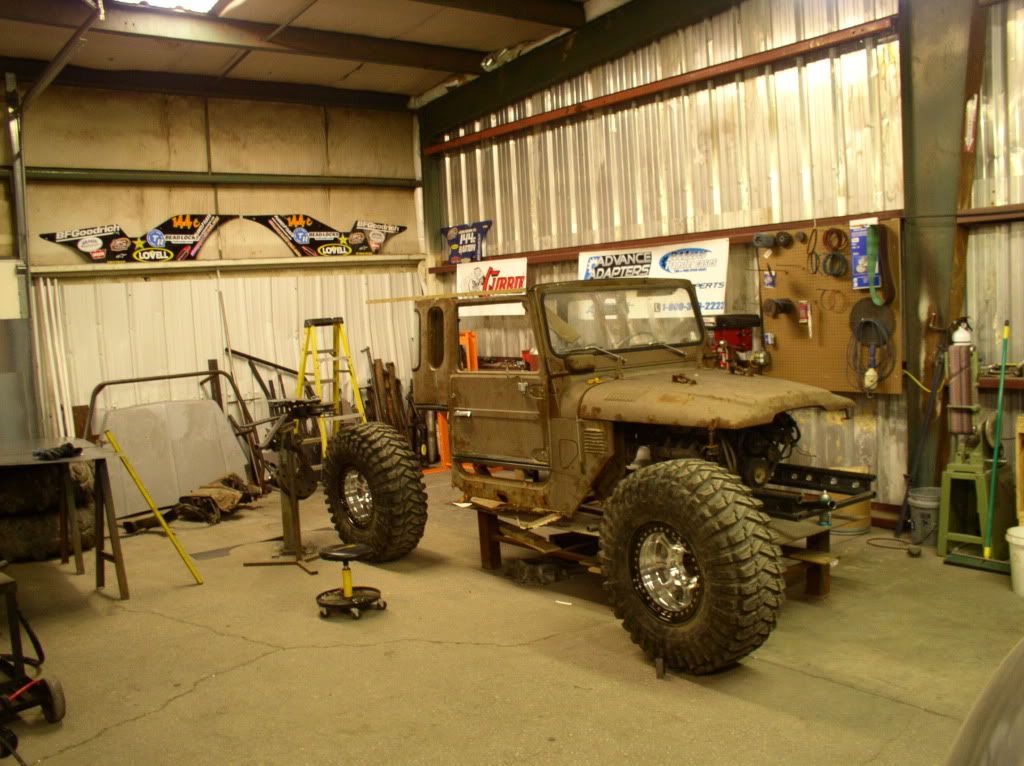
The build started out as a 4link on my YJ(pictured in the back of the second shot), in record time it got way out of hand. I took the jeep apart for the build and then decided that an FJ build would be better. Being a tube buggy it doesn't need much of the original truck the FJ laying outside of Richard's shop seemed liked perfect match.
At that point i dragged the FJ in and tore it apart.


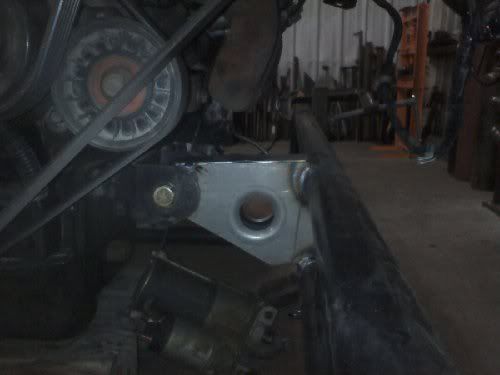
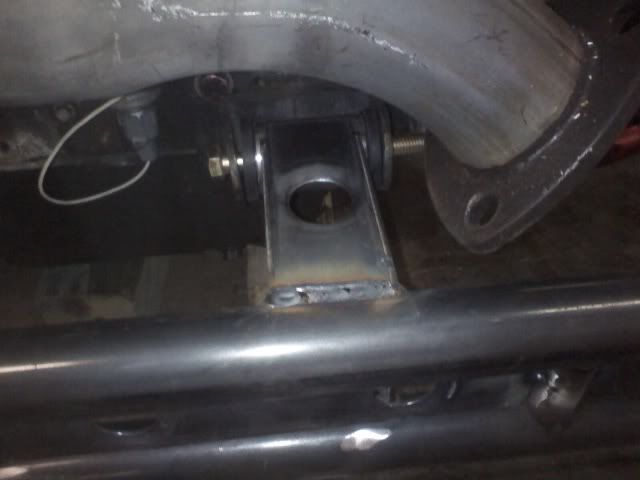
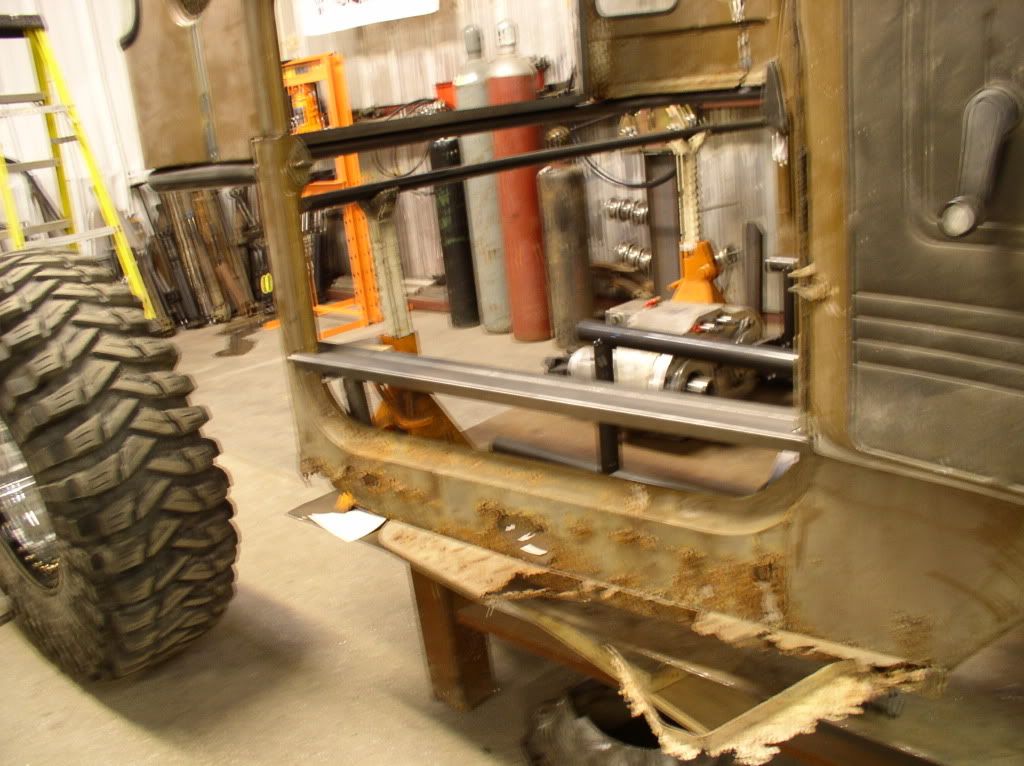
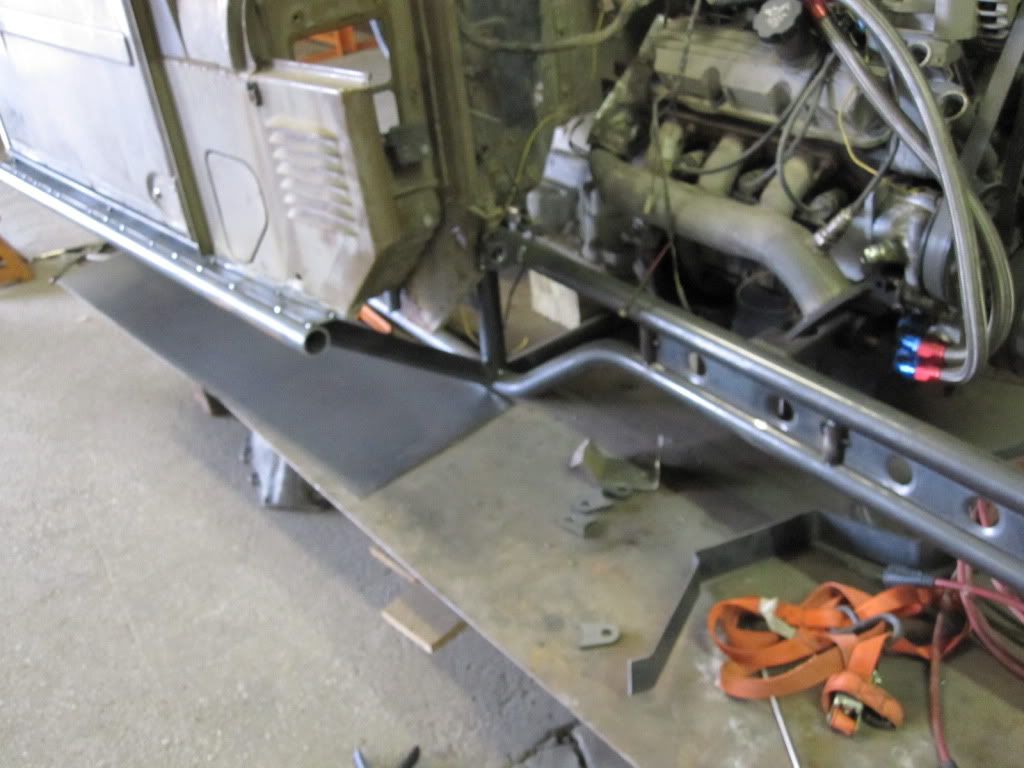
Then Richard built the subframe for the drivetrain and for something that the body could
mount to. Dimple died engine mounts are sweet. Not really needed and you can't really see them but that is how he does things. Lots of cool touches if you look real close.
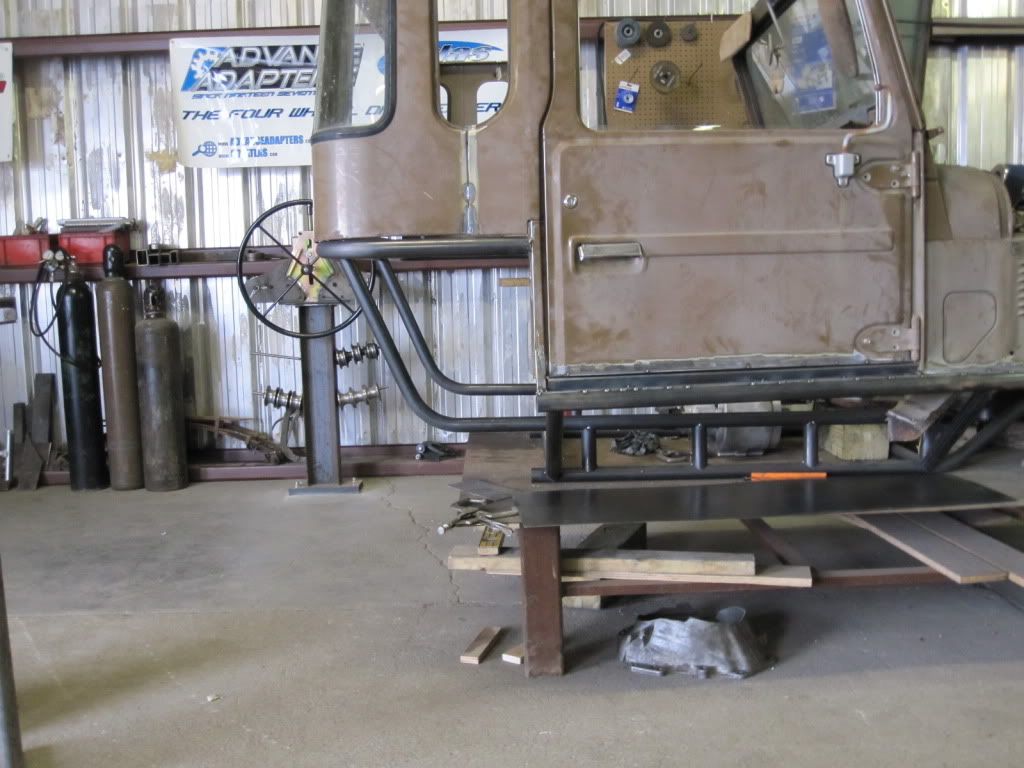
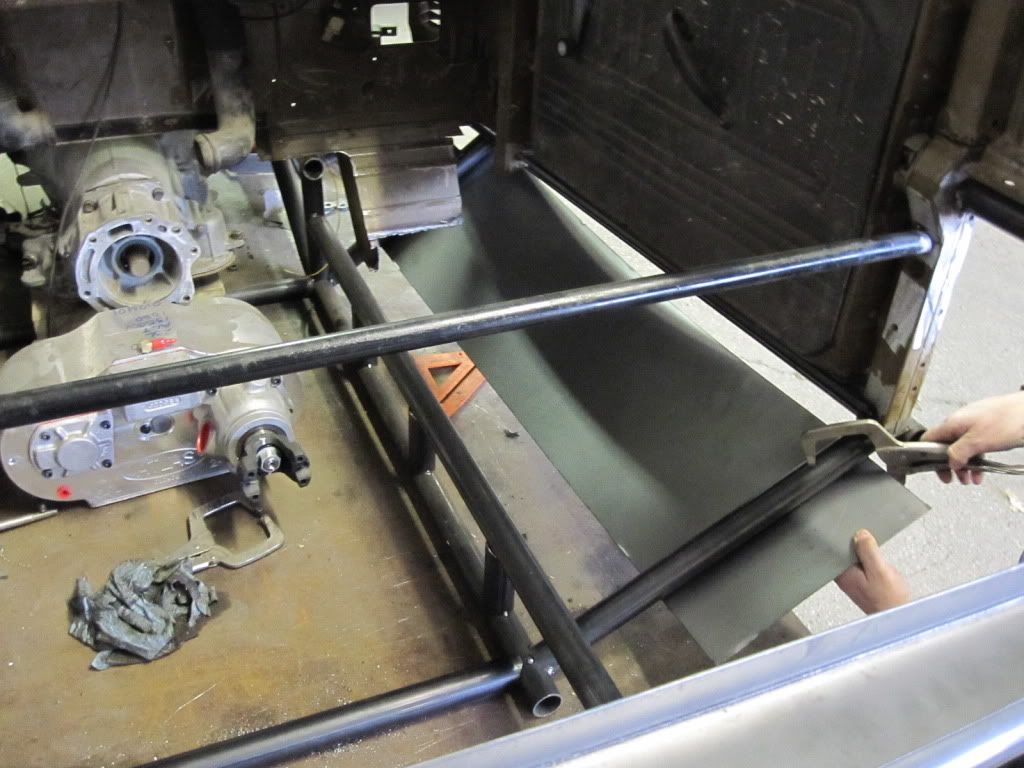
Then the REAL cutting began and it's not even close to being chopped yet. Richard cut
it up and put enough together to start framing the build.
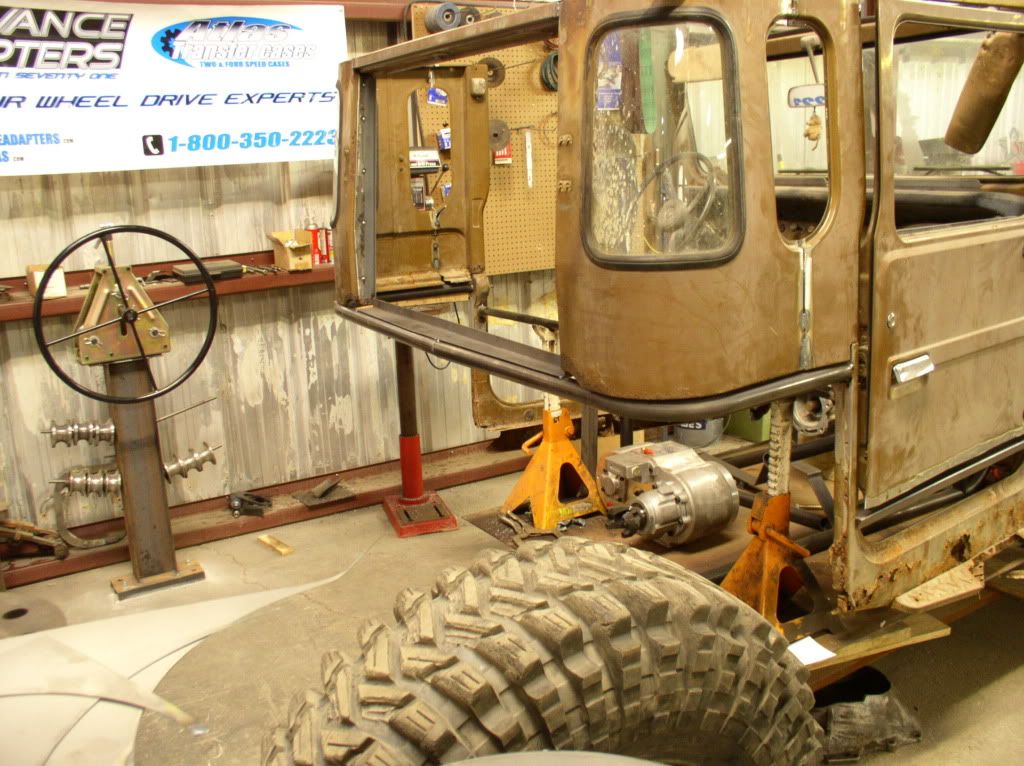
The next big cuts will be under the door. It will have a major boat side with cutting board skids. Trying to keep it a low center of gravity, the design is centered around being able to slide over and threw stuff with ease.
I didn't want a full SUV like an FJ40 but the FJ45 offered way to little room in the cab.
When bouncing it freaks me out having metal and glass so close. Also will let me move the seat back and have room for stereo junk and a cooler inside the cab.


The back is shorter then an FJ40 but longer then an FJ45. Basically an FJ45 king cab.
Maybe an FJ46? If there was such a thing. ;)
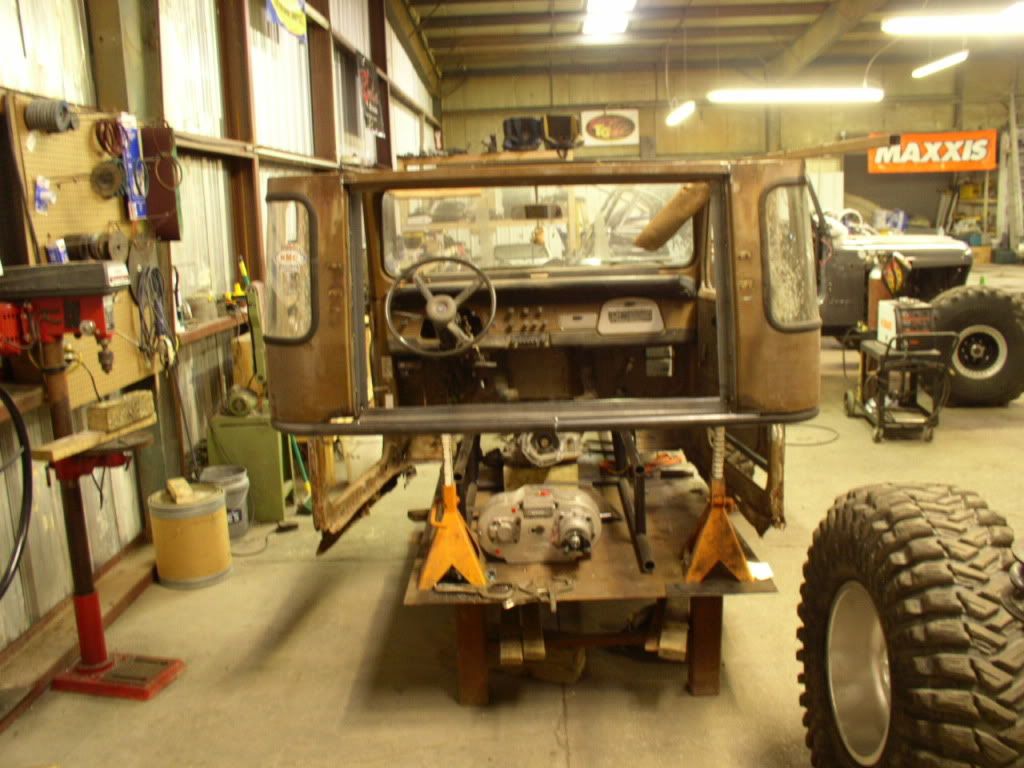
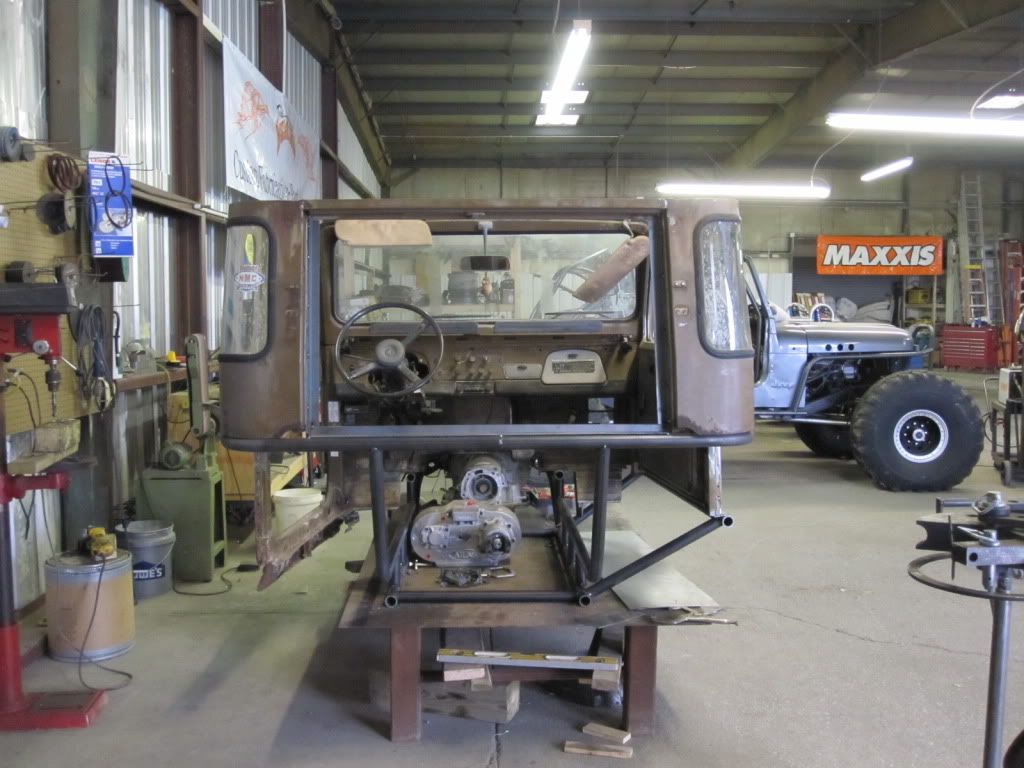
After that I put the hood and tires on to get an idea of the look. Me liky!
Tires in the pic are not spaced like we will have it and the whole buggy will be a little higher. Total of 116 wheel base is what we came up with.
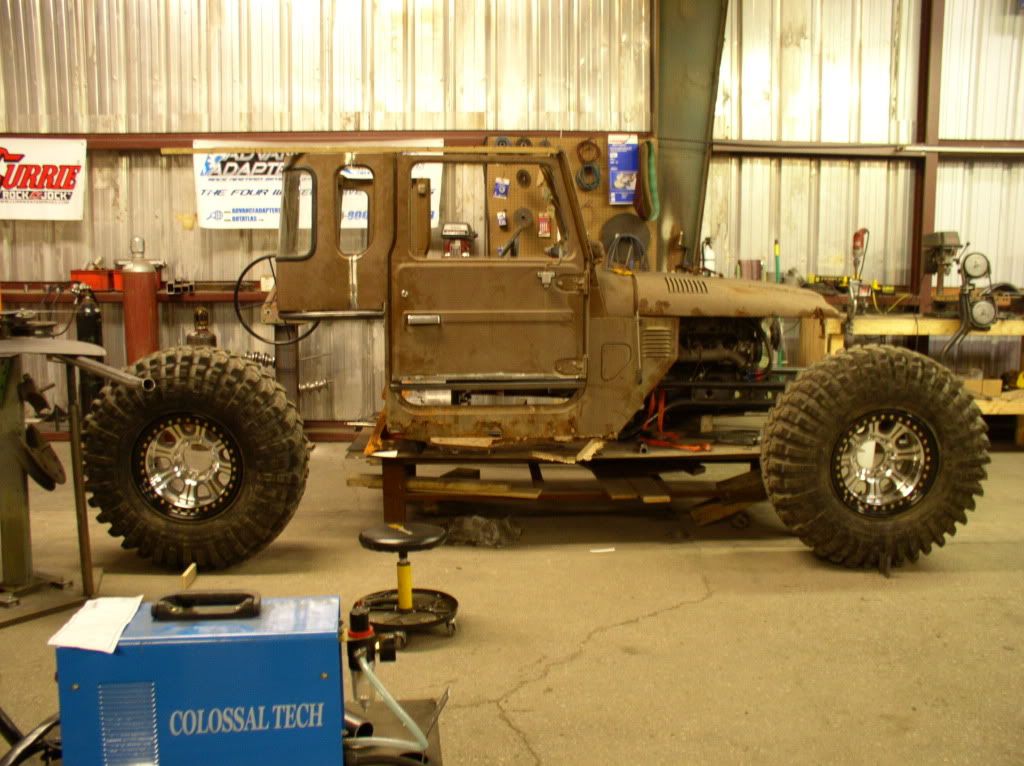
Next update will have the boat side and the body tied in. Not sure when but there will also be a 6 to 8 inch square bed on the back to balance the look of the front hood.
LATEST PIC
LATEST DRAWING
Large pile of 70s Jap rust
Double frame rail tube chassis
3800 super charged V6
904 trans
5.1 atlas
Raceline wheels
40/17 maxxis trepador tires
60 front w/PSC steering, Dynatrac chromoly shafts and joints, Dynatrac Hubs, Detroits w/5.13
60 rear w/PSC steering, cv shafts and joints, Detroits w/5.13
alu links johnnies on lowers, hiems on uppers
PRP seats
Griffin radiator and coolers
Vintage heat and air
Fiberglass hood, fenders and grill
most of the work is being done by Richard at The http://thehobbieshop.com/
Hard to say what it really is. It not a frame build since everything is tubed. Not really a tube buggy since it has a boxed cab. It will have some exo cage and some not. A real mixed up beast, just like I want it.
The build started out as a 4link on my YJ(pictured in the back of the second shot), in record time it got way out of hand. I took the jeep apart for the build and then decided that an FJ build would be better. Being a tube buggy it doesn't need much of the original truck the FJ laying outside of Richard's shop seemed liked perfect match.
At that point i dragged the FJ in and tore it apart.
Then Richard built the subframe for the drivetrain and for something that the body could
mount to. Dimple died engine mounts are sweet. Not really needed and you can't really see them but that is how he does things. Lots of cool touches if you look real close.
Then the REAL cutting began and it's not even close to being chopped yet. Richard cut
it up and put enough together to start framing the build.
The next big cuts will be under the door. It will have a major boat side with cutting board skids. Trying to keep it a low center of gravity, the design is centered around being able to slide over and threw stuff with ease.
I didn't want a full SUV like an FJ40 but the FJ45 offered way to little room in the cab.
When bouncing it freaks me out having metal and glass so close. Also will let me move the seat back and have room for stereo junk and a cooler inside the cab.
The back is shorter then an FJ40 but longer then an FJ45. Basically an FJ45 king cab.
Maybe an FJ46? If there was such a thing. ;)
After that I put the hood and tires on to get an idea of the look. Me liky!
Tires in the pic are not spaced like we will have it and the whole buggy will be a little higher. Total of 116 wheel base is what we came up with.
Next update will have the boat side and the body tied in. Not sure when but there will also be a 6 to 8 inch square bed on the back to balance the look of the front hood.


Comment